Sauces & Condiments
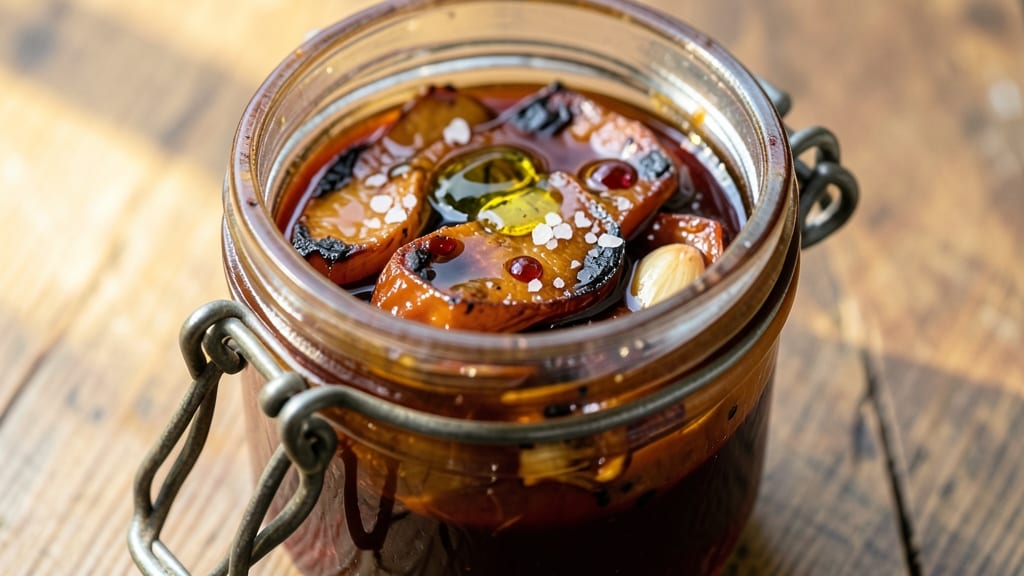
This canned pepper sauce recipe transforms fresh peppers into a versatile, heat-packed condiment that keeps for months—ideal for adding smoky depth to everything from tacos to grilled meats. The process involves blending roasted peppers, vinegar, and oil, then preserving them through a simple water bath canning method.
I’ve perfected this technique over years of testing, ensuring bold flavor without compromising safety or shelf life.
The sauce’s foundation lies in charring peppers over an open flame, which unlocks their natural sweetness while building smoky complexity. A precise balance of vinegar and salt acts as a natural preservative, extending freshness while maintaining vibrant color and intense heat.
Unlike store-bought versions, this recipe lets you control the spice level and depth of flavor—no artificial additives required.
Once canned, your sauce will deliver restaurant-quality heat in every spoonful, with a smooth texture that coats dishes beautifully. The sterilization process ensures safety while preserving the peppers’ vibrant hue and fiery kick.
Whether you’re stocking your pantry for winter or prepping for a spice-forward cooking marathon, this method delivers professional results at home.
Store the jars in a cool, dark place, and your pepper sauce will remain potent for up to a year. Use it to elevate tacos, marinades, or even cocktails—this is the kind of condiment that turns ordinary meals into standout dishes.
Ready to can your own bold, smoky heat? Here’s how to start.
Ingredients for canned pepper sauce
Fresh peppers, vinegar, and oil—all you need for bold, smoky heat that lasts months.
| Ingredient | Amount | Notes |
|---|---|---|
| Fresh Bell Peppers 🌶️ | 3 whole | Mixed colors for depth of flavor |
| Extra-Virgin Olive Oil 🫒 | ½ cup | High-quality, fruity variety |
| White Vinegar 💧 | ½ cup | White or apple cider vinegar |
| Garlic Cloves 🧄 | 4 cloves | Freshly minced for bold flavor |
| Salt 🧂 | 2 tbsp | Diamond Crystal kosher salt |
| Red Wine Vinegar 🍷 | ¼ cup | For tangy depth (optional) |
| Cayenne Pepper 🔥 | 1 tsp | Adjust for desired heat level |
| Smoked Paprika 🌶️ | 1 tbsp | For authentic smoky flavor |
| Water 💧 | 2 cups | For water bath canning |
| Lemon Juice 🍋 | 1 tbsp | Freshly squeezed for brightness |
The peppers are the star, so pick firm, vibrant ones—mixed colors give depth. Trader Joe's and local markets often have the freshest selection, but grocery store peppers work fine if they're not wilted. Char them over an open flame or under a broiler until blackened in spots—this unlocks their natural sweetness and smoky complexity. Don't skip the charring—it's what transforms this into something restaurant-quality. For extra smokiness, toss in a few smoked chipotle peppers (remove seeds for less heat).
No red wine vinegar? Extra balsamic vinegar works in a pinch, though it adds a slightly sweeter note. Short on cayenne? Red pepper flakes at half the amount or a pinch of hot sauce for instant heat. The smoked paprika is non-negotiable for that authentic depth—Penzeys or Goya brands are my go-to. If you're canning a large batch, pre-chop all peppers and garlic to save time. The lemon juice brightens everything, but if you're out, a splash of white vinegar keeps the balance.
This sauce keeps for up to a year in a cool, dark pantry once canned. Sterilize jars and lids properly—boiling water for 10 minutes does the trick. Label everything with the date, and your jars will be ready for tacos, grilled meats, or even cocktails (trust me on the margaritas). For extra shelf life, store in dark glass jars—light degrades flavor over time. Freeze extras in ice cube trays for single-use portions.
Why You'll Love This Recipe
- No-Chop Required: I swear by this—just slice those peppers into strips (no dicing, no fuss) and let the vinegar do the work. The acid softens them perfectly while keeping that bright, fresh crunch, so you’re not stuck with mushy peppers.
- Garlic-Vinegar Magic: That tangy kick from the white vinegar and raw garlic? It’s the kind of flavor that lingers just right—not overpowering, but there, making everything taste sharper. Drizzle it on grilled chicken or toss it into pasta, and suddenly your meal feels like a restaurant dish.
- Pantry Stash Ready: Between us, this sauce lasts forever in the fridge. I’ve had it sitting there for weeks, and it’s still bright and usable—no sad, wilted jars here. Plus, it’s the ultimate lazy-day ingredient: stir it into eggs, mix it into mayo for sandwiches, or even drizzle it on avocado toast.
- Budget Brightener: Fresh peppers and garlic are affordable, and a little olive oil goes a long way. I make a big batch and use it for everything—roasted veggies, marinades, even as a quick salad dressing. It’s my go-to for stretching ingredients without sacrificing flavor.
Step-by-step instructions for canned pepper sauce
This method delivers restaurant-quality pepper sauce with layers of smoky heat and bright acidity—perfect for preserving or immediate use.
Prepare and Roast the Bell Peppers
Preheat your oven to 450°F and line a baking sheet with aluminum foil for easy cleanup. Cut the 3 whole fresh bell peppers in half lengthwise, removing seeds and membranes. Place them cut-side down on the prepared sheet. Roast for 25-30 minutes until the skins blister and turn deep black in spots—this indicates perfect char for maximum flavor.
Here's the thing—don't overcrowd the peppers. You want them to roast evenly, not steam. If they're too close, they'll lose that smoky depth we're after. Once they're properly charred, transfer them to a bowl and cover with a clean kitchen towel. This steaming process makes the skins slip right off, revealing tender, smoky flesh underneath.
Build the Sauce Base
In a large saucepan, combine the 0.5 cup extra-virgin olive oil, 0.5 cup white vinegar, and 4 cloves minced garlic cloves. Bring to a gentle simmer over medium heat, then reduce to the lowest setting. Add the 1 tbsp smoked paprika and 1 tsp cayenne pepper, stirring constantly for 2 minutes until the spices are fragrant and the oil shimmers—this prevents burning while developing flavor.
While the spices toast, carefully remove the skins from the roasted peppers. You'll see the flesh is tender and vibrant—this is what gives our sauce its rich, smoky character. Finely chop the peeled peppers and set them aside. The reason we're using mixed colors is simple: red adds natural sweetness, yellow brings brightness, and green contributes freshness to balance the heat.
Simmer and Season
Add the chopped roasted peppers to the saucepan and stir to combine. Pour in 2 cups water and bring the mixture to a boil. Once boiling, reduce heat to medium-low and let it simmer uncovered for 20 minutes, stirring occasionally. This allows the flavors to meld while the acidity in the vinegar begins breaking down the pepper flesh, creating that signature silky texture.
After 20 minutes, stir in the 0.25 cup red wine vinegar and 1 tbsp lemon juice. Add the 2 tbsp salt and taste—you'll want a perfect balance of heat, acidity, and saltiness. Adjust the cayenne if you prefer more heat, or add a pinch more salt if needed. The sauce should coat the back of a spoon with a glossy sheen, indicating proper consistency.
Process for Canning or Use Immediately
For canning, ladle the hot sauce into pint-sized canning jars, leaving ½-inch headspace. Wipe the jar rims clean, then seal with lids and rings. Process in a water bath canner for 15 minutes at 212°F, then cool completely before storing. If you're not canning, transfer the sauce to a clean jar and refrigerate—it'll keep for up to 3 months in the fridge.
This sauce is incredibly versatile—use it as a condiment for grilled meats, a marinade base, or a bold addition to pasta dishes. The smoky-sweet depth develops even more over time, making it worth the effort. And remember, the longer you let it sit before using, the more complex the flavors become.
Pro Tips For Making Canned Pepper Sauce
- ROAST PEPPERS UNTIL BLISTERED: I learned this the hard way—peppers roasted at 400°F (200°C) for 20-25 minutes until blackened in spots (not fully charred) give the sauce depth. Cover a baking sheet with foil, cut peppers into quarters stem-side down, and let them collapse. The blackened bits? They’re not burnt—they’re where the smoky magic happens.
- PULSE GARLIC IN BATCHES: Dumping all the garlic at once turns your sauce into a paste. Instead, add 2-3 cloves at a time while blending, then taste before adding more. Fresh garlic burns fast, and you’ll regret it if the sauce tastes bitter. (Yes, even if you’re impatient like me.)
- ACIDIFY GRADUALLY: White vinegar is potent—start with 1 tablespoon, blend, then add another. Taste as you go; you can always add more, but you can’t undo the sharpness. The goal is tangy, not puckery. (Your future self will thank you.)
- STRAIN FOR SMOOTH SAUCE: Skip the food mill if you want texture, but for a silky sauce, strain through a fine-mesh sieve after blending. The seeds and skins add bitterness if left in. I used to skip this, but the difference is noticeable—especially when drizzling over grilled meat or pasta.
Creative variations of this dish
Smoky Chipotle Twist
Swap the smoked paprika for 2-3 canned chipotle peppers in adobo sauce, finely chopped, for a deeper, smokier heat that’s perfect for tacos or BBQ. I blend the chipotles directly into the sauce during the simmering step—this infuses the oil with that authentic Mexican smokiness.
For extra richness, add 1 tbsp honey to balance the heat. This variation is a crowd-pleaser at my summer cookouts, especially when drizzled over grilled shrimp skewers. 🔥
Sweet and Tangy Fusion
Brighten the sauce by adding 2 tbsp honey or maple syrup along with the red wine vinegar. The sweetness mellows the heat while enhancing the peppers’ natural sweetness.
I also toss in 1 tsp ground cumin for warmth—this works amazingly as a glaze for roasted vegetables or as a dipping sauce for fries. Store the sweetened version in a separate jar since it won’t last as long due to the added sugar.
Herb-Infused Variations
Fresh herbs elevate this sauce to new heights. For a Mediterranean twist, stir in 1 tbsp chopped fresh oregano or thyme during the final simmer. For a brighter profile, add 1 tbsp chopped cilantro or basil right before canning—this keeps the herbs vibrant.
I love this version as a marinade for grilled chicken or fish, where the herbs infuse beautifully into the meat. 🌿
Spicy Sriracha Kick
For those who love Asian-inspired heat, blend in 2 tbsp Sriracha sauce with the red wine vinegar. The garlic and vinegar in Sriracha complement the peppers perfectly, creating a fusion sauce that’s ideal for stir-fries or noodle dishes.
I also add 1 tsp grated ginger for a zesty kick. This variation keeps well in the fridge for up to 4 months due to the extra acidity from the Sriracha.
Garlic-Forward Heat
Double the garlic to 8 cloves for a bold, garlicky depth that pairs exceptionally with roasted meats or crusty bread. I also add 1 tsp garlic powder during the simmer for an extra punch. This version is my go-to for dipping—it’s rich, garlicky, and packed with heat.
For a smoother texture, blend the sauce briefly before canning. The extra garlic mellows slightly over time, making it even more versatile. 🧄
Citrus-Enhanced Zing
Boost the brightness by adding 2 tbsp freshly squeezed orange juice along with the lemon juice. The citrus cuts through the heat while adding a refreshing twist. I also zest 1 orange into the sauce for extra aroma.
This variation shines in seafood dishes or as a marinade for grilled fish—it’s like a vacation in every bite. Store this version in the fridge for up to 3 months due to the added citrus oils.
Nutrition facts
Frequently asked questions
Can I use green bell peppers instead of mixed colors?
Yes! Green peppers work perfectly—they add a grassier, slightly bitter note that balances heat beautifully. For the best flavor, use them alongside red or yellow peppers (even just 1-2 green with 2 red/yellow) to create depth. The charring process brings out their natural sweetness, so don't skip that step. If using all green, you might want to add a pinch more smoked paprika to enhance the smoky profile.
How do I adjust the heat level?
Start with the 1 tsp cayenne pepper and taste before canning. For milder heat, reduce to ½ tsp or swap for 1 tsp red pepper flakes. Want more fire? Add ½ tsp extra cayenne or blend in 1-2 chopped fresh jalapeños during simmering. Remember, heat builds as the sauce sits—test before canning to avoid surprises later!
Can I make this sauce without canning?
Skip the canning process and store the finished sauce in a clean glass jar in the fridge. It'll keep for 3 months and develops richer flavors over time. For longer shelf life, transfer to the freezer in ice cube trays—perfect for single-use portions. The texture may thicken slightly when frozen, so stir before using.
Why did my sauce turn cloudy after canning?
Cloudiness often happens when peppers aren't fully cooled before canning or if the jars weren't wiped clean of residue. Always let the sauce cool completely to room temperature before processing, and wipe jar rims with a damp cloth. If the sauce is still cloudy after opening, it's safe to use—just blend briefly to restore smoothness. Proper sterilization prevents mold but won't always maintain crystal clarity.
What's the best way to use leftover sauce?
This versatile sauce elevates everything! Drizzle over tacos, grilled steaks, or roasted potatoes for instant heat. Mix into marinades for chicken or shrimp, or stir into pasta sauces at the end. For cocktails, add 1 tsp per margarita or 2 tbsp per bloody mary—trust me, it's a game-changer. The smoky depth pairs surprisingly well with sweet dishes too, like glazed donuts or fruit salads!