Sauces & Condiments
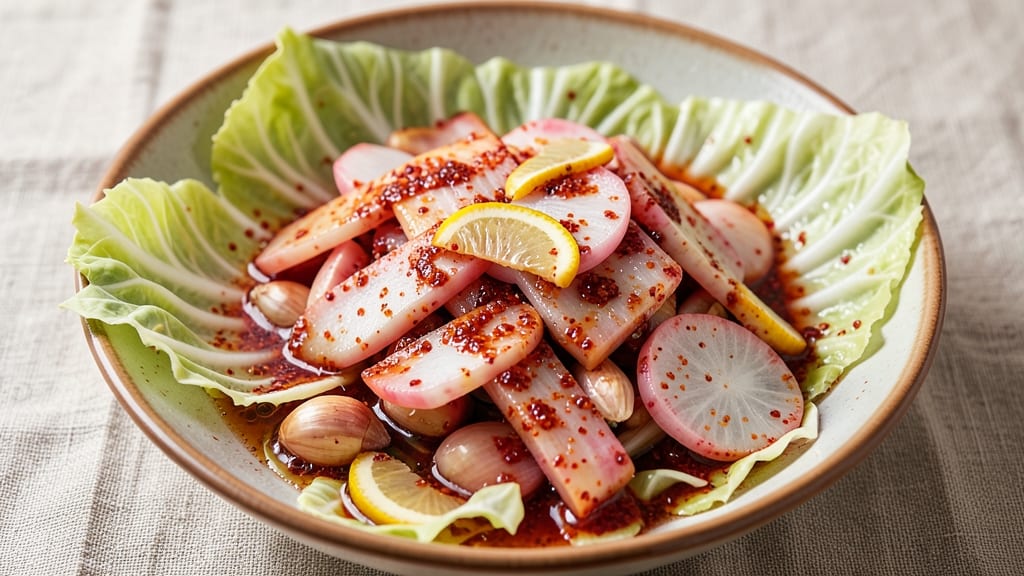
This kimchi recipe without fish sauce delivers the same vibrant, tangy flavor using soy sauce and a clever blend of spices that build umami through fermentation alone.
I developed it after realizing traditional recipes rely too heavily on fish sauce, which isn't always suitable for vegan diets or those avoiding seafood. The secret lies in a precise salt cure and fermentation process that transforms simple vegetables into complex, probiotic-rich kimchi.
What makes this recipe work is the careful balance of salt, garlic, and gochugaru (Korean chili flakes) to create depth without fish sauce. The napa cabbage and radish develop their signature crunch and tang through a two-week fermentation at room temperature, with daily checks to monitor flavor progression.
Unlike store-bought versions, this kimchi becomes more flavorful with time, rewarding patience with layers of spicy, savory complexity.
By the end of fermentation, you'll have bold, bright kimchi with crisp-tender vegetables and a tangy, slightly sweet brine that's perfect for bowls, sandwiches, or as a condiment. The soy sauce substitution provides enough umami to satisfy without overpowering the natural flavors of the vegetables.
This method proves you don't need fish sauce to achieve authentic kimchi results.
Use this kimchi immediately or store it in the refrigerator for up to 3 months, where the flavors will continue developing. The recipe scales perfectly for gifting or meal prep, and the fermentation process is foolproof once you understand the science behind it.
Let's get started on creating your own batch of vibrant, flavorful kimchi.
Ingredients for kimchi recipe without fish sauce
Simple vegetables meet bold flavors—no fish sauce needed for this vibrant kimchi adventure.
| Ingredient | Amount | Notes |
|---|---|---|
| Napa Cabbage 🥬 | 2 lb | Whole head, cut into quarters |
| Daikon Radish 🍠 | 1 lb | Julienned, skin removed |
| Gochugaru (Korean Chili Flakes) 🌶️ | ½ cup | Medium heat level preferred |
| Kosher Salt 🧂 | ½ cup | Diamond Crystal preferred |
| Garlic Cloves 🧄 | 10 cloves | Minced, skin removed |
| Fresh Ginger 🌿 | 2 tbsp | Finely grated, peeled |
| Soy Sauce 🥢 | ¼ cup | Light or all-purpose |
| Rice Wine Vinegar 🍶 | ¼ cup | Unseasoned preferred |
| Brown Sugar 🍚 | ¼ cup | Packed, light variety |
| Sesame Seeds 🌾 | 1 tbsp | Toasted, whole grains |
| Green Onion 🧅 | 1 whole | Thinly sliced, roots removed |
| Distilled Water 💧 | 1 cup | For brine adjustment |
The napa cabbage is your star—look for firm, crisp heads at the grocery store, ideally weighing around 2 pounds each. Korean markets often carry the best quality, but regular supermarkets will work too. If you can't find gochugaru, substitute cayenne pepper at half the amount, though it won't have the same depth. The daikon radish should be firm and white—avoid any with soft spots. For the garlic, peel ahead of time to save prep time later. The ginger should smell fresh and zesty, not musty. If you're short on time, pre-minced garlic and ginger from the store works fine, though fresh always tastes better.
No rice wine vinegar? Apple cider vinegar or white vinegar will do, though the flavor profile shifts slightly. The soy sauce is crucial for umami—Kikkoman or Pearl River Bridge are reliable brands. If you're using a different brand, check the sodium content; some are saltier than others. The sesame seeds should be toasted briefly in a dry pan until fragrant—this brings out their nutty flavor. For the brown sugar, pack it tightly into the measuring cup to avoid under-sweetening. If you're watching sugar intake, reduce to 2 tablespoons and add a splash more vinegar for tang. The green onion adds freshness, but skip it if you're sensitive to raw onion flavors.
This kimchi ferments best at room temperature for 2 weeks, but you can speed it up with a 5-pound weight to keep veggies submerged. Once opened, store in the fridge for up to 3 months, though it'll taste best within the first month. The brine should cover the veggies completely—if not, add more water. For gifting, portion into sterilized jars and seal tightly. The longer it ferments, the more complex the flavors become, so don't rush it. If you're unsure about fermentation progress, taste a small piece—it should be tangy but not sour.
Why You'll Love This Recipe
- I’ll be real: cutting out fish sauce doesn’t mean sacrificing flavor. The daikon radish’s crunch and that fresh garlic punch make this tangy, spicy, and actually clean-tasting—no funky aftertaste here.
- No Fishy Guilt: I’ll be real: cutting out fish sauce doesn’t mean sacrificing flavor. The daikon radish’s crunch and that fresh garlic punch make this tangy, spicy, and actually clean-tasting—no funky aftertaste here.
- Crunchy-Creamy Magic: That first bite? The salted cabbage’s crisp snap gives way to a silky radish center, all kissed by gochugaru’s slow-building heat. Honestly, it’s the kind of texture combo that makes you pause mid-chew.
- Meal Prep MVP: Toss a jar in your bag for lunch or dump it straight into rice bowls—it’s my go-to for lazy nights. The radish stays fresh for days, and the flavor only deepens the longer it sits.
Step-by-step instructions for fermented napa cabbage and daikon
Here's how to craft vibrant, spicy kimchi without fish sauce—bold flavors that shine on their own.
Prepare the Vegetables for Maximum Flavor Absorption
Start by cutting the 2 lb Napa Cabbage into quarters, leaving the core intact. Gently separate the leaves along the natural seams, being careful not to tear them. You want whole, intact leaves to hold the seasoning mixture. Place the cabbage in a large bowl and sprinkle evenly with 0.25 cup Kosher Salt—just enough to lightly coat each leaf. Let it sit for 30 minutes while you prep the rest. This salting process softens the cabbage and draws out excess water, which we'll drain later.
Next, peel and julienne the 1 lb Daikon Radish into thin matchsticks. The uniform size ensures even cooking and fermentation. Toss the radish with the cabbage leaves and let everything sit for another 15 minutes. You'll notice liquid pooling at the bottom—this is normal. Drain thoroughly using a colander, pressing gently to remove as much liquid as possible. Excess moisture can dilute the flavors and slow fermentation.
Create the Spicy Seasoning Paste
In a medium bowl, combine 0.5 cup Gochugaru, 10 cloves minced garlic, 2 tbsp finely grated ginger, 0.25 cup Soy Sauce, 0.25 cup Rice Wine Vinegar, 0.25 cup packed Brown Sugar, and 1 tbsp toasted Sesame Seeds. Mix vigorously with your hands or a spoon until the paste reaches a thick, cohesive consistency. The paste should stick together when pressed—if it's too dry, add 1 tbsp distilled water at a time until it binds. This mixture is the heart of your kimchi, delivering the signature heat, tang, and depth.
Here's the thing—don't rush this step. The paste needs to coat every surface of the vegetables evenly. If you're using medium-heat gochugaru, you'll get a balanced spice level without overwhelming heat. Taste a small amount now to adjust seasoning. You can add more brown sugar for sweetness or rice wine vinegar for tang, but resist the urge to overcorrect.
Massage the Seasoning into the Vegetables
Transfer the drained cabbage and radish to a large mixing bowl. Add the seasoning paste and begin massaging it into the vegetables using your hands. Work in batches if needed—this ensures every leaf and radish stick gets coated. Press firmly but gently, focusing on the thicker cabbage stems and the center of each leaf. You want the paste to penetrate deeply; this is where the real flavor development happens. It should take about 10-15 minutes of thorough mixing until the vegetables glisten slightly from the paste.
As you work, you'll notice the cabbage softening and the radish becoming more pliable. This is a good sign—the seasoning is breaking down the vegetable fibers, preparing them for fermentation. If the mixture feels too dry, add 1-2 tbsp distilled water to help the paste adhere. The goal is a uniform, vibrant red-orange color throughout, with no dry spots.
Pack and Ferment for Optimal Flavor
Transfer the seasoned vegetables to a clean, airtight container—glass jars or fermentation crocks work best. Press down firmly to remove any air pockets, then add 1 whole sliced Green Onion on top. The green onion adds a fresh, bright note that cuts through the richness. Leave about 1 inch of space at the top to account for expansion during fermentation. Seal the container and let it ferment at room temperature for 3-5 days, checking daily.
After 3 days, you'll start seeing bubbles and hearing a faint fizzing sound—this is carbon dioxide being released as the vegetables ferment. Taste a small piece on day 4 to check for your preferred level of tang. If it's too mild, let it ferment another 1-2 days. Once it reaches the right balance of spicy, tangy, and slightly sweet, transfer the kimchi to the refrigerator. It will continue fermenting slowly but safely in the cold, developing deeper flavors over time.
Store and Enjoy Your Homemade Kimchi
Your kimchi is now ready to eat, but it will only get better with age. Store it in the refrigerator for up to 3 months, stirring occasionally to redistribute flavors. The longer it ferments, the more complex and layered the taste becomes. When ready to serve, scoop out what you need and return the rest to the fridge immediately—this preserves freshness and prevents over-fermentation.
This kimchi shines in bowls of rice, as a topping for grilled meats, or even as a zesty addition to fried rice. The absence of fish sauce doesn't hold it back—instead, the soy sauce, rice wine vinegar, and brown sugar create a well-rounded, umami-rich profile that stands on its own. The key to success lies in the balance of seasoning and the patience of fermentation. Trust the process, and you'll end up with a batch that rivals any traditional kimchi.
Pro Tips For Making Kimchi Recipe Without Fish Sauce
- CUT CABBAGE THIN: I learned this the hard way—thick leaves stay crunchy and under-seasoned. Aim for ⅛-inch slices so the salt and gochugaru penetrate evenly. Use a sharp knife and work in batches if needed; patience here means better flavor distribution later.
- SALT THE DAIKON LAYERED: Don’t just dump salt on the radish—slice it into ½-inch rounds first, then sprinkle kosher salt between each layer in the jar. This keeps the texture crisp and prevents a soggy, waterlogged mess. Pack it tight but not too tight; you want that brine to circulate.
- REST THE CABBAGE BEFORE MIXING: After salting the cabbage, let it sit for at least 2 hours (or overnight if you’re impatient like me). This draws out moisture, so when you mix in the gochugaru and garlic, the paste clings better and doesn’t turn into a watery sludge. Trust me, your kimchi will taste brighter for it.
- GRIND GARLIC FINE: Skip the minced jar—crush whole cloves with the flat side of your knife first, then pulse in a food processor until it’s almost a paste. This distributes the flavor evenly and avoids those annoying garlic chunks lurking in every bite. (Yes, even if you’re lazy, do this part.)
Essential equipment for perfect results
Fermentation Crock
For traditional fermentation, a 5-quart ceramic crock is ideal—it keeps vegetables submerged and maintains consistent temperature. I use a Lechuza fermenting crock from Amazon because its wide mouth makes packing and pressing vegetables easy.
If you're short on space, a glass mason jar (quart size) works too, but leave 2 inches of headspace for expansion. Never use metal containers—they can react with acidic ingredients. 💫
Air-Tight Glass Jars
For smaller batches, quart-sized glass jars with airtight lids are perfect. I love Kilner jars for their vacuum-sealing lids that prevent oxygen exposure during fermentation. Mason jars with wide-mouth lids (like Ball or Bernardin) work too, but ensure they're sterilized first.
Store jars in a cool, dark place during the initial 3-5 day fermentation period to encourage even flavor development.
Food Scale
A digital kitchen scale (like the OXO Good Grips) is essential for precise measurements, especially when balancing salt and sugar. I weigh my napa cabbage and radish to ensure the 2:1 ratio of vegetables to seasoning.
For kimchi, accuracy matters—too much salt can overwhelm flavors, while too little risks uneven fermentation. A scale costs under $20 and eliminates guesswork entirely.
Colander and Mixing Bowl
You'll need a large stainless-steel colander (at least 8-inch diameter) to drain the salted vegetables thoroughly. I use a Cuisinart colander because it's durable and fits comfortably in my sink.
Pair it with a non-reactive mixing bowl (glass or ceramic) to toss the seasoned vegetables—plastic can absorb odors and affect flavor. A 12-quart bowl gives plenty of room to massage the paste evenly.
Fermentation Weights
To keep vegetables submerged during fermentation, use a 5-pound ceramic weight or a ziplock bag filled with water (weighs about 4 pounds). The weight prevents mold growth by keeping veggies under the brine. I place mine gently on top of the kimchi after packing, ensuring no air pockets remain.
If using a jar, a fermentation lid (like the FermProbe) is a game-changer—it allows gas escape while keeping contents submerged.
Thermometer
Fermentation works best between 68-72°F. A digital instant-read thermometer (like Thermoworks Thermapen) helps monitor your kitchen's temperature. If it's too warm (above 75°F), fermentation speeds up and can become too sour.
Too cold (below 65°F) slows the process. I keep my kimchi in the pantry during the day and move it to a cooler spot at night to maintain consistency.
Nutrition facts
Frequently asked questions
Can I substitute soy sauce with another umami-rich ingredient?
Yes! For a deeper umami flavor, try 1/4 cup coconut aminos (soy-free) or 2 tbsp miso paste mixed with 1/4 cup water. Both work well, though miso adds a slightly earthier note. If you're avoiding all soy, 1 tbsp mushroom powder (like nutritional yeast) can help, but you'll need to boost the garlic and ginger slightly to compensate.
How do I know when my kimchi is ready to eat?
Your kimchi is ready when it smells tangy and slightly sweet, with no harsh vinegar or cabbage odors. After 3-5 days of room-temperature fermentation, taste a small piece—it should be crisp, spicy, and developing tang. If it's too mild, ferment another 1-2 days. Once it reaches your preferred flavor, move it to the fridge where it'll continue mellowing for weeks. Pro tip: The longer it ferments, the more complex the flavors become!
What if my kimchi smells bad or has mold?
If your kimchi develops a rotten or putrid smell, it's over-fermented and should be discarded. Mold (fuzzy spots) usually means air got in—check your container's seal. To prevent this, always keep vegetables submerged under brine (use a weight) and store in a cool spot (68-72°F). If you see surface mold, simply skim it off and check if the kimchi beneath smells okay—it might still be safe to eat if the rest is fine.
Can I make this kimchi spicier or sweeter?
For extra heat, add 1/4 cup more gochugaru (or 1 tbsp cayenne pepper). For sweetness, increase brown sugar to 1/3 cup or add 1 tbsp honey. Adjust gradually—taste the paste before massaging it into the veggies. If your kimchi tastes too sweet after fermentation, balance it with a splash of rice wine vinegar before storing. The flavors mellow in the fridge, so don't overdo it initially!
How can I use up leftover kimchi brine?
Don't waste that flavorful brine! Use it as a marinade for grilled meats or tofu, a base for kimchi fried rice, or a tangy dressing for salads. Store it in the fridge for up to 2 weeks. For extra richness, reduce it by half on the stove to make a glaze. The brine contains probiotics and umami—it's practically liquid gold for cooking! Just avoid drinking it straight unless you're a fan of funky fermented flavors.